I love me a good cardigan. They are so comfy and a great wardrobe staple to add to a dress or a shirt and jeans. I also love that they hide my arms!:)
Maternity clothes have been hard for me to come by lately (seriously, who wants to spend $20 on a pair or shorts that will only be worn for a few months??) and I wanted a new little coat to wear now that it's summer.
I found a long sleeve cardigan at my local thrift store for $1 and decided I could turn it into a more modern looking one with a little flair.
I started by trying on the sweater and seeing where I wanted the sleeves to be (a little below my elbow) and cut off the sleeves at that length. I also cut the ribbed cuff off with a 1/2" extra at the top. I saved the pieces of the sleeve that I cut out to make the embellishments for later.
Next, I flipped the cuff inside out and lined up the seam on the cuff with the seam on the sleeve (with raw edges of cuff and sleeve aligned) and pinned in place.
I took the base attachment off my sewing machine and stretched the cuff and sleeve onto my sewing machine and sewed around the whole cuff with a 1/2" seam allowance.
Here is the new cuff flipped right side out again.
To make it look less like I hacked my own sweater, I put the new sleeve on my machine again (with the sleeve right side out this time) and sewed a 1/4" top stitch above my cuff seam line.
This made the new sleeve look less "puffy" where I had reattached the cuff and made it look more like it came that way originally.
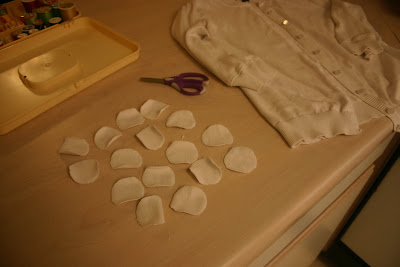
I repeated the process on the other side and when I was done I took my sleeve pieces that I had set aside and cut them into circles (I got 16 circles total from both pieces).
After playing around with a few designs, I noticed the circles just kept folding up into little "tacos" all on their own..so I decided to keep that same form and sew them along the inside of the cardigan. I sewed 8 circle "tacos" on each side.
I started by sewing a straight stitch down the middle of the circles (adding a new circle as I went on the machine) and then to keep them in place a little better, I sewed two additional stitches on either side of my center stitch.
Here is one of the worst pictures of me modeling the cardigan for you:) Oh well, my husband wasn't home to take a picture and we are leaving for CA in a day...so no time to waste people! Note to self: Pregnant bellies don't photograph well from the front...
So that's my $1 cardigan transformation! This process could be done to make the sleeves any length that you want...as long as the cuff will fit the part of your arm that you are adjusting it to:)
OK, I'm off to California for the weekend! And although I won't be going to Disneyland (seriously...I'm SO bummed about that) I can't wait to sit on a beach and do nothing! Well, there will be some sight seeing involved, a visit to the town where I was born, and a Pink's Hot Dog as well:)
If any of you live ( or love) the Anaheim / Los Angeles area and have some fun ideas for what we could do while we are there...PLEASE leave them in the comments section! We aren't super touristy...but we would love to try out some new and exciting things while we are by the coast;)


Love it!!! Can't wait to hear all about your trip!! :)
ReplyDeletelove it!!!!!
ReplyDelete