

I have expressed my eternal love for zebra print and damask...but now there is a close third....chevron. Does anyone else love this print?? I would love a huge rug in our living room...but maybe after I don't have a toddler?
So, the next best thing to a rug was throw pillows. I finally bought a huge roll of freezer paper for $5 a few weeks ago and I have been using it for so many things!
Wanna make your own chevron pillows? Then let's go!
Materials:
paint of choice (I chose black acrylic)
materials for pillows (I got 1 and 1/2yds for two pillows)
freezer paper
pillow forms or stuffing
matching thread
iron
1. Cut out a piece of fabric that is the height of your pillow plus 1" and double the length, plus 2".
Example: I wanted my finished pillows to be 17"x17"...so my rectangle was 18"x36". I also cut two because I was making two pillows.

2. Cut out a piece of freezer paper the size of your fabric rectangle:

3. Draw out your design on the freezer paper, cut out, and iron the shiny side down on your fabric.
(To get the chevron design, I found a chevron pattern through Google Images, blew it up on my computer monitor to the desired thickness, and then held up my freezer paper to the screen and traced it with a pen)

4. Paint your fabric.
Tip: You will get cleaner edges if you brush away from the paper...that way you don't pull it up and get paint underneath it.

5. Peel your freezer paper strips off:

So, when I started this project, I planned on having the chevron design on both sides of the pillow...but then realized how long it took to trace, cut, and iron my freezer paper. At this point I opted to just have the design on one side of the pillow.
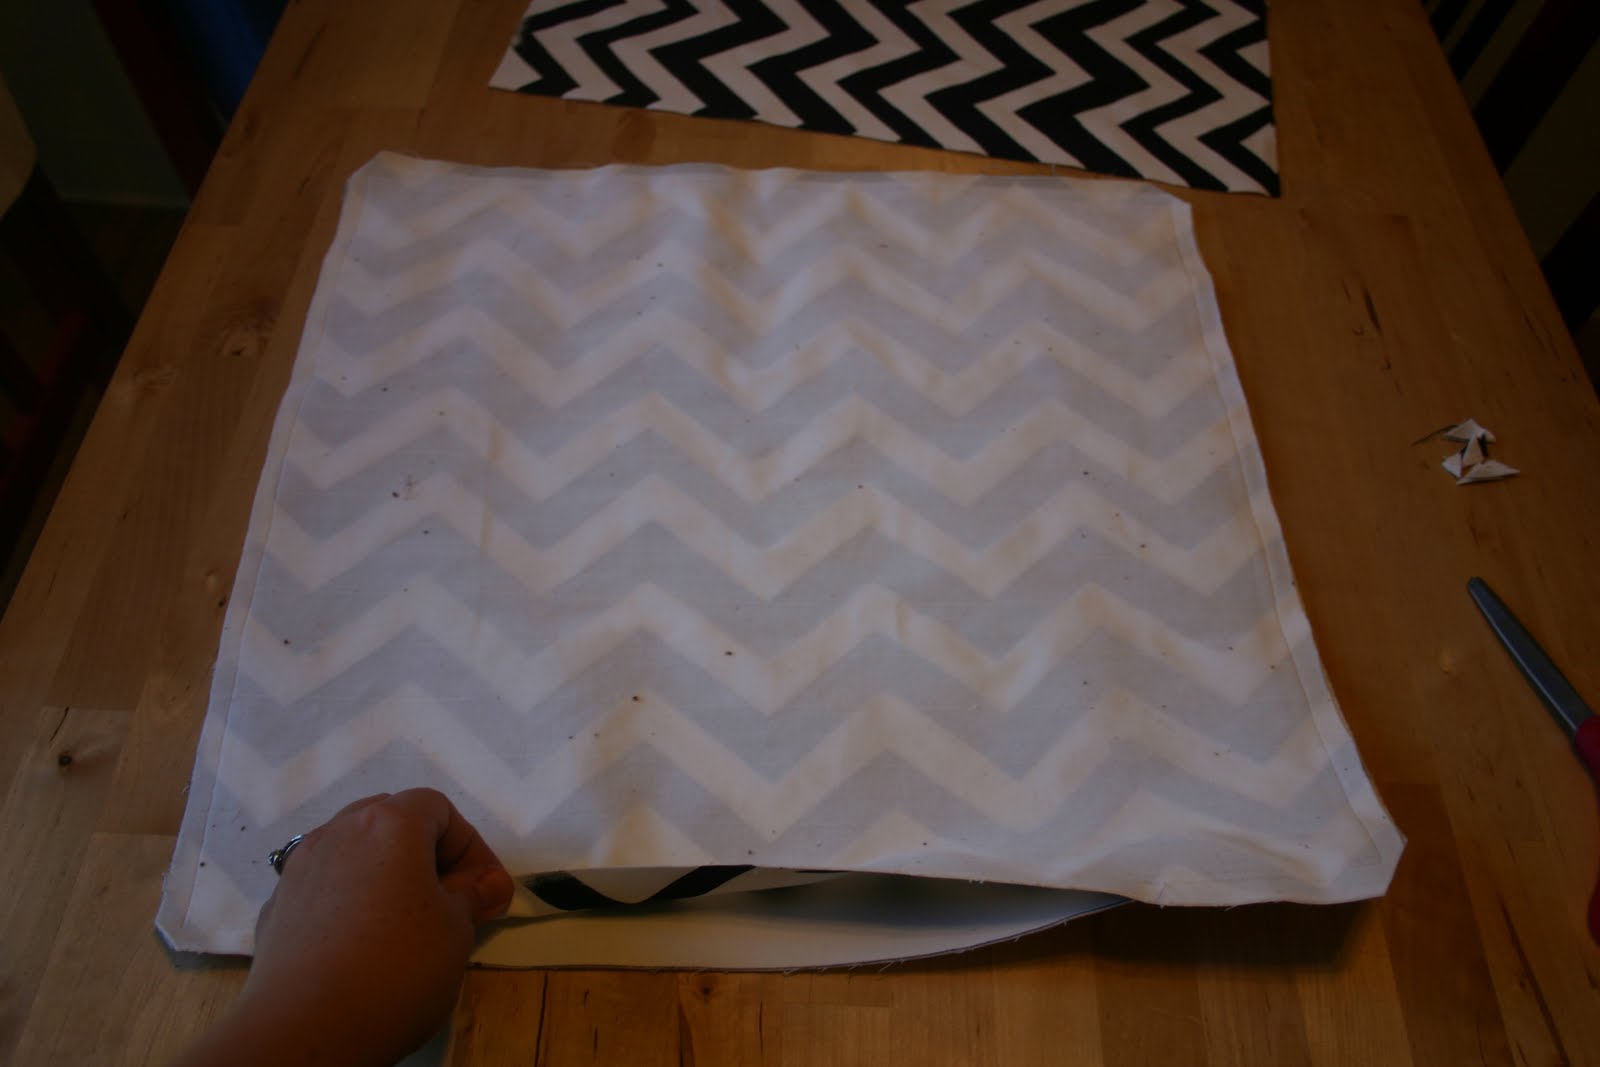
6. Cut your painted fabric piece in half (so you have your pillow panels) and do the same with your other fabric rectangle:

7. With right sides together, pin your edges and sew around the pillow with a straight stitch leaving an opening at the bottom to flip right side out and stuff. Clip the corners (not through the stitching).
8. Flip pillow cases right side out and stuff (I used two other pillows).

9. Fold inside bottom edges in and sew closed.

As my daughter would say, "Tada!".

It really didn't end up bothering me that the backs are blank. These are going on my bed and I can't even see the backs anyways...so it's not a big deal.
Also, I used acrylic paint because they are going in my bedroom which is normally a kid free zone (I know...mean Mommy!) but if I was putting them in the living room, then I would have used fabric paint so that I could wash the covers.
Price:
paint: $.50
material: $2.25
pillow stuffing: $3.00
Total: $5.75
I'm linked to:

Love it lady!
ReplyDeletelove your guts
mandi
Adorable- those are really cute!
ReplyDeleteLOVE zigzags/chevrons!! I totally love the pillows too and I would do them in my living room, although they wouldnt match at all. Thanks for linking up!
ReplyDeleteWhat fun pillows! I love B&W. These look great.
ReplyDeleteLove, love, love these! Great job and great idea. I, too, do the freezer paper stencils but I don't know if I'm daring enough for this. But I sure would like to try. Thanks for the inspiration!
ReplyDeleteFound you from BCD. Come check out LBT when you get a chance. Thx!
Angelene
LBT
http://littlebuggietutu.blogspot.com
Wow! Those are darling. I love them. Can you whip me up some?!
ReplyDeleteClever girl! I love that you traced from your computer screen. Oh, I need to make some of these.
ReplyDeleteThey're gorgeous! I want to make curtains with this pattern. You've inspired me to get started on that!
ReplyDeleteLove. Love. Love the pillows. I would have never known that you used a freezer paper stencil because it looks so amazing. Good Job! You have inspired me to make some new pillows!
ReplyDeleteHalsey
spunkyjunky.blogspot.com
SUPER cute! I love chevron and you did a great job!
ReplyDelete