Monday, November 15, 2010

Minnie Mouse Christmas Ornament

Every year I like to make an ornament that reflects something our daughter did that year. Her first year we have a "Baby's First Christmas" ornament. The second year she got to meet Elmo at the local mall (an ornament is still in the works) and then this year we went to Disneyland...so of course we needed some sort of Disney ornament.

With all of the excitement while we were in California, I forgot to purchase an ornament in the park. Then when we got home I didn't see the purpose in spending so much on one from the Disney store if it wasn't from the actual park.

So...that left my last option....handmade!

Materials:

bobby pin (or paper clip)

Styrofoam balls (1 big, two small)

polka dot ribbon

craft rhinestone

black paint

hot glue gun

I found this Styrofoam snowman kit at Joann for $1. I used a coupon that was about to expire to make it a whole $.60!

Inside the kit was the perfect sized Styrofoam for Minnie's head:

1. I took my bobby pin and inserted it in the top of the largest ball. This is so can attach an ornament hook later.

You could also use a paper clip for this. In hindsight, I would have cut the bobby pin shorter so it didn't stick out so much.

2. I painted the ball black.

3. I took one of the smaller balls and cut a little bit off the bottom to give it a flatter surface for gluing to the larger ball.

4. I glued both of the smaller ones to the larger where the "ears" should be.

5. Then I painted the smaller ones black as well.

6. For the bow I cut some old polka dot ribbon I had.

7. I folded both ends into the center and glued them together.

8. I applied glue to the center and pinched the bow in half.

9. Finally I sealed the ornament with a little glossy Mod Podge, glued the bow on, and then glued a craft rhinestone on the center of the bow.

My daughter already loves it! She can't wait to put up our Christmas tree next week:)

This would even be cute if you wrote the year on the front or your child's initial! Or, how cute would it be to make a Mickey one with a top hat and a Minnie with a wedding veil for a newlywed couple?

I think I ended up liking my $.60 version better than any of the ones at the Disney Store:)

I'm linked to:

Tatertots and Jello

Saturday, November 13, 2010

Easy Camera Strap Cover

My friend called me the other night to tell me she ordered a really cute camera strap cover off of Etsy. She asked if I had ever thought of making one...and I had a while back and it just got put off with all the other "crafts for another day" that are in my head:)

Well, after she showed me hers, I had camera strap cover envy...so I made a really simple one for myself. I also opted for a cover instead of a new strap because my husband also uses our camera so I wanted to be able to remove it when he wanted to use it.

Now, I call this an "easy" cover because I cut a lot of corners. First off, can I get a little love for my fellow "it's nice to be lazy every now and then" crafters? I mean, I am all about putting time into a craft...there are just some days (and some crafts) that I want done and over with, you know?

Anyways...this is one of those crafts...and all you "I would never cut corners" crafters out there...hows about you come join me on this lazy side of crafting and then enjoy the extra time you have after cutting all those corners:)

Materials:

fabric for strap (I used snuggle flannel so it would be nice and soft)

fabric for camera lens pocket

matching thread

hot glue gun

1. Cut your strap fabric the same length as your strap (plus 1") and double the width (plus 1")

Now, one thing my friend mentioned was that her strap cover had a pocket for the camera lens cap. I also knew I wanted that, but since my lens cap is wider than my strap...I made a separate pocket for it (instead of sewing one into the strap) so that my strap would not be too wide.

2. So, cut a pocket piece for your cap that is the same size in width (plus 1") and double the length (plus 2").

3. Now, starting with the strap material, fold in each end 1/4" and then another 1/2" and sew with a straight stitch.

4. With right sides facing, fold your strip in half lengthwise and sew up the raw edge with a straight stitch.

5. Slip your cover over your strap.

Now, my cover was still a little loose and I didn't want it bunching up on me, so I top stitched along both sides of the strap cover (being careful not to sew into the actual strap inside). It created more of a snug fit.

Now onto the cap pouch:

6. Fold in the short edges of your pocket piece 1/2" and then another 1/2" and sew with a straight stitch.

7. With right sides facing, sew up both raw sides with a straight stitch.

To make the pocket look a little nicer on the strap, I sewed the bottom corners in a little bit to be the width of the strap cover.

8. Flip pocket right side out.

To also make this look a little more "finished" I top stitched around the outside of the pocket.

OK, ready for my ultimate "I just want this done, I don't really care if it lasts forever because I will most likely change my mind tomorrow" step?

I hot glued the pocket onto the strap. Oh yes I did!

I liked this alternative of attaching the pocket on afterwards better because now my cover fits snug to the strap without having to be wide enough for the lens cap.

So, this project was free cause I already had the material. I see myself with a cuter patchwork one in the near future...but this was a fun and easy project that got me out of my crafting rut:) I do see a little rosette on the pocket maybe.

So, what are your cheating secrets? I would love to hear them!

I'm linked to:

Sew Much Ado

Tatertots and Jello

Monday, November 8, 2010

Embellished Bobby Pins

I have had a string of craft failures lately (don't you hate that?) so I needed a quick, impossible to screw up, craft.

I found these fabric covered scrapbooking brads at Joann's. I loved them immediately, but I don't paper scrapbooking anymore...so I thought they might be fun to attach to bobby pins!

First, I pulled both prongs on the back straight up:

Then I cut them with some wire snippers (I really don't know the actual name of the tool I used...sorry).

After I snipped them off, I used the snippers to press the little sharp ends down:

Next, I cut out little circles on felt that were a little smaller than the brads:

I sandwiched the piece of felt in the bobby pin:

Finally, I hot glued the back of the brad to the top part of the bobby pin:

That's it! Super easy and I got a little bit of my crafting confidence back:) I love putting them in my daughter's hair...and I even wore one myself the other day.

The total price for all 12 embellished bobby pins was $1.40! The brads were $2.99 but I had a coupon and I already had the pins:)

I'm linked to:

Tatertots and Jello

Thursday, November 4, 2010

Anthro Inspired Necklace...revisited:)

I have gotten so many wonderful comments and emails about my Anthro Inspired Necklace for Round 1 over at Sew Dang Cute's Crafting with the Stars competition! Thanks to everyone who has had kind words to say about it:)

A lot of questions I have been getting is where I got the beads...and how for so cheap? Well, I managed to hit Joann's when their beads were 40% off. Normally they are always some sort of percentage off though...or sign up for their mailer and get several coupons that way as well.

I prefer Joann's just because they will take more than one of their own coupon in one transaction...along with competitor coupons. Michaels is kind of crabby and you can only use one coupon per day. Both stores also ad match other craft stores. Oh...and Hobby Lobby doesnt take any competitor coupons at all. Got all that? Oh if only I could make a living with all this useless knowledge in my head!:)

Here is the bead breakdown:

gray/silver pearls: Blue Moon Beads (orig. 1.49...on sale $.89)

black beads: bracelet from Tinkerbell...$1.00

gray opaque beads: Blue Moon Beads (orig. 1.99 on sale $1.19)

So that's how it breaks down to just about $3 for all the beads. Do a little digging around at your craft store. Blue Moon Beads have a lot of different lines of beads that are very affordable (all their fake pearls are $1.49 and come in many different colors) and many times the store will put the whole brand on sale. I had to dig through the little bins for the opaque beads at the top.

I hope that helps anyone interested in making something like this:) Please send me a picture if you make it! I would love to show it off!

Wednesday, November 3, 2010

Minnie Mouse Pumpkin

I know Halloween is over...and most of you have disposed of your pumpkins (or what's left of them)...but we like to keep our pumpkins until Thanksgiving. Then, the week of Thanksgiving, I toast the seeds and make a few desserts from the puree.

We haven't had time to go to a pumpkin patch yet ( we have one more weekend until they all close), but my dad brought over a pumpkin for my daughter last night. I was just going to sit it by the front door, but it looked too sad and a little boring. I got this Minnie idea from when we visited Disneyland in September. They had giant pumpkin heads of the characters and I thought the Minnie and Mickey were so cute!

For the "ears" I found this bag of pumpkins at Walmart on clearance for $1 after Halloween. I wanted all orange ones...but they were a lot smaller and kind of rotten:(

I drew the face on first...it was much easier to do before I attach anything to it. Then I pulled out some old ribbon I had and tied it around the stump:

I used two toothpicks to attach the small pumpkins to the large one. I went to the dollar store for BBQ skewers...but they didn't have any.

And that's it! My daughter is in love with it (of course)...but has already asked where Mickey is...so we will be making a trip to the actual pumpkin patch to find our "Mickey" pumpkin:)

Now the front porch looks much better:)

So, do you think it's weird to keep a pumpkin as decor past October? Why should they get tossed as soon as it rolls over to November? I say display your pumpkins proudly until Thanksgiving:)

Tuesday, November 2, 2010

DIY Chevron Pillows

I have expressed my eternal love for zebra print and damask...but now there is a close third....chevron. Does anyone else love this print?? I would love a huge rug in our living room...but maybe after I don't have a toddler?

So, the next best thing to a rug was throw pillows. I finally bought a huge roll of freezer paper for $5 a few weeks ago and I have been using it for so many things!

Wanna make your own chevron pillows? Then let's go!

Materials:

paint of choice (I chose black acrylic)

materials for pillows (I got 1 and 1/2yds for two pillows)

freezer paper

pillow forms or stuffing

matching thread

iron

1. Cut out a piece of fabric that is the height of your pillow plus 1" and double the length, plus 2".

Example: I wanted my finished pillows to be 17"x17"...so my rectangle was 18"x36". I also cut two because I was making two pillows.

2. Cut out a piece of freezer paper the size of your fabric rectangle:

3. Draw out your design on the freezer paper, cut out, and iron the shiny side down on your fabric.

(To get the chevron design, I found a chevron pattern through Google Images, blew it up on my computer monitor to the desired thickness, and then held up my freezer paper to the screen and traced it with a pen)

4. Paint your fabric.

Tip: You will get cleaner edges if you brush away from the paper...that way you don't pull it up and get paint underneath it.

5. Peel your freezer paper strips off:

So, when I started this project, I planned on having the chevron design on both sides of the pillow...but then realized how long it took to trace, cut, and iron my freezer paper. At this point I opted to just have the design on one side of the pillow.

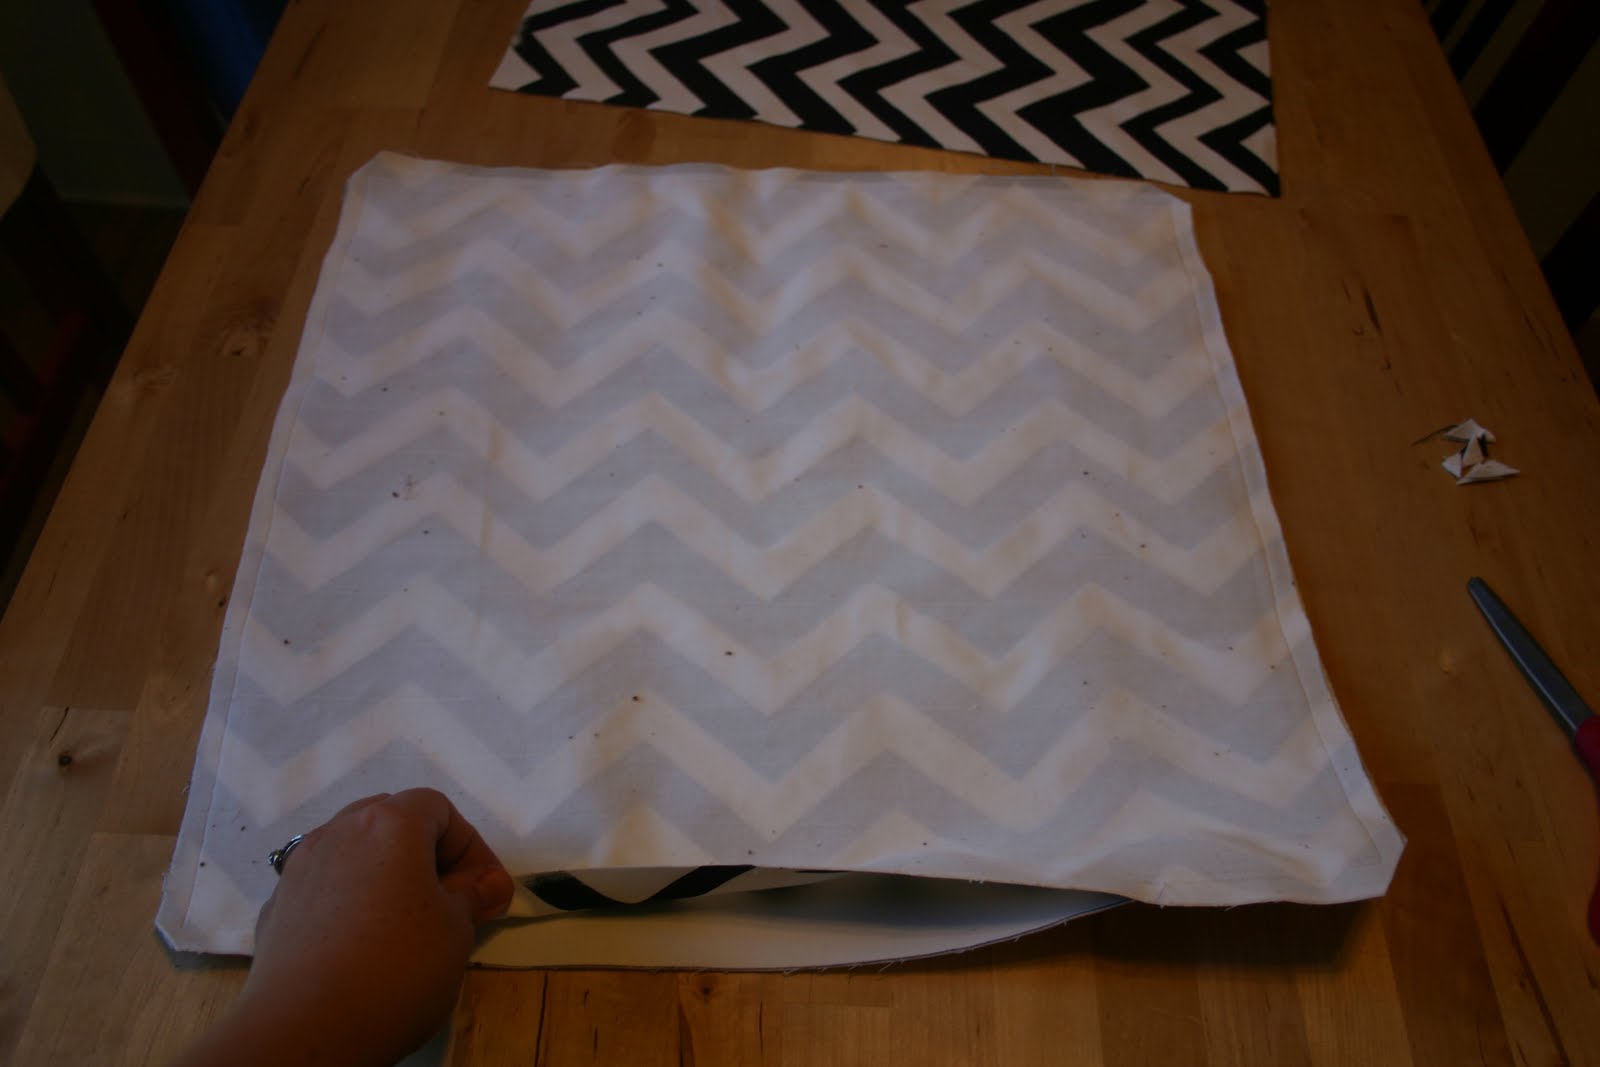
6. Cut your painted fabric piece in half (so you have your pillow panels) and do the same with your other fabric rectangle:

7. With right sides together, pin your edges and sew around the pillow with a straight stitch leaving an opening at the bottom to flip right side out and stuff. Clip the corners (not through the stitching).

8. Flip pillow cases right side out and stuff (I used two other pillows).

9. Fold inside bottom edges in and sew closed.

As my daughter would say, "Tada!".

It really didn't end up bothering me that the backs are blank. These are going on my bed and I can't even see the backs anyways...so it's not a big deal.

Also, I used acrylic paint because they are going in my bedroom which is normally a kid free zone (I know...mean Mommy!) but if I was putting them in the living room, then I would have used fabric paint so that I could wash the covers.

Price:

paint: $.50

material: $2.25

pillow stuffing: $3.00

Total: $5.75

I'm linked to:

Sew Dang Cute

Honeybear Lane

Sew Much Ado

Someday CraftsText Color

Olivia Renn

Tatertots and Jello

Monday, November 1, 2010

Dining Room Chairs Redo

We got this table and chairs set off craigslist almost a year ago. It came with black chairs originally...well they were poorly stained black chairs. Don't you hate it when pictures online aren't very accurate?

So I always planned on painting the chairs black...until I got this wild hair to paint them red. I thought it would be so cool and different. Then 5 cans (and 2 trips to Walmart) later...I hated the chairs, hated Walmart, and decided I was neither cool nor different..and I should have just painted them black. Ever do that during a project?

Well, I stuck it out and finished painting them (they seriously took about 20 coats each) and finally liked them...a little.

Then I distressed the edges...all while my mother is asking me, "You're going to do what? Ruin the paint job?"...so there is more time of me explaining to her that it's what our generation does...and then the conversation just ends with us both agreeing that my generation likes to ruin things...sigh.

But after the distressing and a good night's sleep (anyone ever sneeze the color you have been painting with? TMI?)...I fell in love with them. Can you be in love with chairs? Let's see...they don't talk back when I tell them to stop jumping on the couch, or when their work uniforms are still wet in the dryer...so yeah, I love them:)

Now we just have to see if they can survive a toddler...another reason why I distressed them beforehand:)

Total makeover: $15 (5 cans of spray paint)

I'm linked to:

Thrift Decor Chick

Sew Dang Cute

Honeybear Lane

http://
Photobucket

LinkWithin

Related Posts with Thumbnails