Tuesday, May 31, 2011

I'm in Love...with a Steam Mop

A couple of years ago we owned a home. There was wood flooring throughout the whole home. Silly-no kids yet-wood floors are so cool and different- me thought they were such a great selling point...until about two weeks after we moved in. I felt like I had to clean then ALL THE TIME! We live in the southwest, so there is just constant dust coming in from the outside and after about three years there I thought I was going to lose it!


So we moved into an apartment...with nasty carpet...and I longed for my wood floors again.


We moved AGAIN into this condo at the beginning of the year...and there are wood floors throughout. Can you see the pattern I am in?


So, I hate them. Yes, I know hate is not a nice word, but basically if wood floors never existed in my life again...I would be totally OK with that. Everyone comes into our place and says, "Oh, wood floors are so nice!" and I kinda wanna punch them...or hand them my Swiffer to clean up the dusty footprints they just brought in.


So, after using wet floor wipe after wet floor wipe, only to still have my socks be dirty after cleaning...I gave up hope of ever having truly clean floors...then I ran into this:


(source)


I was at Target (trying to get away from my dirty floors) and saw this guy on clearance from $60 down to $15!! I figured I could give it a try for $15 and brought it home. At first I was very annoyed to find that it had an electrical cord. I know...how did I think it would make steam without it being electric? But still, the happy model girl in khakis doesn't have a cord!


The first few uses were annoying. It didn't "wow" me at first and my floors were kinda streaky afterwards. Then I realized my floors just needed another go around with the steam mop to get off all the nasty soapy junk from all my wet floor wipes. THEN the floors looked SO good! Best of all, they FELT so good!


Here is what the pad looked like (after dry dusting the floors before use):


That's after I had already used a dusting cloth on them before using the steam mop! All this time I had been just swishing the crud around on my floors and paying $3 (per pack of wet wipes) to do so!


So, being the really cool neat freak that I am...I poured some water on the floors and wiped it up with a paper towel to see just how clean they really were...and the paper towel came up totally clean!


So, yes I really just made this whole long post about a steam mop. And no I wasn't contacted by Shark to give a good review on this product:) I rarely buy products like this. The whole "as seen on TV" thing kinda bothers me...but when I find a product that really works, I like to share it:)


This isn't a perfect solution for every day messes. It takes a little bit longer to clean the floors now and it doesn't clean up stains like the box suggests...but I'm finding I only have to do it about once a week downstairs and every other week upstairs and that is a HUGE difference to the almost once a day I was doing before. I still wipe up things really well as soon as they spill, but knowing that my floors are truly clean is wonderful!


Best of all, I am saving money on wet floor wipes, saving my trash from piling up so quickly, and I know that my floors are clean without cleaning chemicals all over them.


So, am I the only one that hates wood floors? So many people love them...is there anyone like me that isn't a fan?

Sunday, May 29, 2011

Nursery Decor Part 2: Girl Style

Earlier I showed you what I am loving in terms of decor if we end up having a boy. Here are my choices if we are having a girl:


I am loving yellows and pinks and browns. My daughter's room is already pink and yellow...so adding another girl to the room would be very easy!


I love the same idea for artwork above the crib.


Side note: I haven't leaned towards wanting one gender or another (I'm basically just so happy to be pregnant and healthy is all that matters!), but after looking at all this girl stuff online...it just makes me SO happy! Plus, we also LOVE the name we have picked out for a girl. Why can't boy names be as easy?? Ah...but then I think of not having a boy and that makes me sad too! One thing's for sure...there is only one in there and we will get to find out what it is in less than two weeks!


I love this Charlotte bedding by Dwell. Although the colors aren't really the direction I am going in (but I love them too!) I love the pattern:


Oh, and isn't this crib amazing??? The hubs and I are in love (with a crib?) and I'm sure if we ever figured out where to buy it...we wouldn't be able to afford it:(


(source)


BTW: I love the stripes mixed in with this pattern. Our crib bedding doesn't have a crib skirt...but I would make one if it's a girl.


In the crib I think a homemade version of this owl is a must. How cute would it be to have one side of the owl "sleeping" and one side "awake"?


(source)


One thing is for sure...if it's a girl this time around...she WILL have a yellow crib...and a pink chandelier:)


(source)


So, it's about time we really find out what this baby is!! I can't wait to start calling them by their name and not "baby" or "it". More power to those moms-to-be that wait until birth to find out the gender. To me...18 weeks is already long enough!! I heard someone say finding out what the baby is early, or at birth is a wonderful surprise either way and I totally agree:)


So, my daughter is convinced it's a girl...and my husband kinda, sorta (totally) would like a little man on his side. Either way, in a week or so...someone is getting taken out for sympathy icecream if things don't go their way:)

Grilled Chipotle BLT's....minus the "L" (under $3)


Maybe I should just switch this to a food blog, huh? Seems like I post more recipes than crafts these days:) Oh well, we are trying to stay on budge by eating at home more and I'm too tired to go out to eat anyways.


I love grilled cheese sandwiches. Like...I could eat one every day of my life and would possibly marry one if I wasn't already married (and also if marrying a sandwich was even possible). My husband is not a huge fan UNTIL I introduced bacon. Yes, bacon is the secret ingredient to make my husband love anything.


So, tonight I combined my love of grilled cheese with another favorite, the BLT.


Ingredients (for 4 sandwiches)


8 slices of sourdough bread $.50


4 slices of provolone cheese $.60


8 slices of tomato (about 3 tomatoes) $.50


4 slices of cooked turkey bacon $.45


2 tbsp Chipotle mayonnaise (or regular mayo if you prefer) $.15


4 slices of deli ham $.50


butter and parmesan (optional)


I start all my grilled cheeses by spreading a bit of butter or margarine on the outside of the bread. For a little extra "punch" I sprinkle some parmesan cheese on top as well.


Now for the inside, I spread a little of my chipotle mayo on the inside of one piece of bread, then layer one half of my cheese slice, the ham, two tomato slices, one bacon strip (cut in half), the other half of the cheese slice, and then the last piece of sourdough bread (with a little chipotle mayo on the inside of that as well).


I grill the sandwich in a skillet on med-high heat, pressing with my spatula as it cooks on either side. It takes just about a minute of either side. Basically you know you will get a perfect grill on one side if you flip it once it stops sizzling on the skillet.


This sandwich is SO good and the chipotle mayo just gives it a little kick and mixed well with the tomato. I found the special mayo in the regular salad dressing aisle...and for $1 with my coupon. You could also add the lettuce to this BLT...I just wasn't sure I would like the taste of warm lettuce. I do want to try it with fresh spinach though.


Total (4 sandwiches): $2.70

Friday, May 27, 2011

Chicken Bacon Spinach Mini Pizzas (Papa Murphy's Inspired)


A while back my friend and I split an amazing pizza from Papa Murphy's called the Chicken Bacon Artichoke from their deLITE menu. It was amazing and since then the hubs and I have gotten one for ourselves again. The only thing was...I didn't have a coupon...so $11 for one pizza just didn't seem like such a great deal.


(source)


So, I decided to make my own version for a fraction of the price. It doesn't take the place of Papa Murphy's, but its a great stand-in on days when we don't want to go out (hello 100+ degrees!) or spend the gas (at almost $4 a gallon).


We had 3 pizzas for lunch (2 for my husband and 1 for me). This recipe makes up to 6.


Ingredients:


1 pkg pita breads $1.00


1/2 c alfredo sauce $.75


4 strips turkey bacon cooked and cut $.50


1/2 fresh spinach leaves cut $.20


grilled chicken $1.00


mozzarella cheese $.50


parsley, salt, and pepper to taste


My first "go to" ingredient for mini pizzas are pita breads (about 7" in diameter). I came across this idea a couple of years ago when I didn't have the energy to make pizza dough...but had these pitas in the refrigerator. I get mine at my local Dollar Tree for $1 and when they are there I usually buy about three packages and freeze them. They also come in whole grain versions and they retail for about $2 in a normal grocery store.


They are so perfect because they are just right for personal portions and they bake up so nicely in the oven.


On one pita I spread out some alfredo sauce and top with spinach. Then I pile on the chicken, bacon, and mozzarella. At the end, I sprinkle it with parsley flakes (or fresh if you have it) and then a little salt and pepper.


I put two at a time on a cookie sheet lined with foil (to prevent a mess) and bake at 350 degrees for 8-10 minutes.


I'm not kidding, when I first opened the oven it smelled EXACTLY like the Papa Murphy's one that we love! The only thing missing from mine was the artichoke hearts. I plan on trying it with those next time.


Also, what I love about mini pizzas is that everyone gets what they want. You can add or take away to each one to make everyone happy:)


Total price (6 personal pizzas): $3.95


Under $4 is a lot better than over $11 any day!

Wednesday, May 25, 2011

No Sew Curtains from a Duvet


This has been one project that I have been putting off for a couple of months. I just haven't been in a sewing mood when it came to a larger project. I'm SO glad I finally got it done though because it made me fall in love with my living room! I have had a love-hate relationship with our decor for quite some time and I am finally figuring out what makes our space feel more like home and more like us.


So, I started with a king size duvet set that I purchased at Goodwill. I also bought the matching pillow shams because I thought it was a queen size (since that's what we have). I washed it and put it on our bed to realize it was a king. So I took a few weeks to decide if I wanted to sew it down to fit...or if I wanted to use it for something else. Long story short, after letting it sit on our bed, the hubs and I decided it was too much design for bedding.


source


Side note: Ironically I fell in love with this pattern about a year ago and had no idea where it came from. I was in an antique store in a nearby city and there was a large piece of fabric with this pattern. I loved it immediately...but the price was ridiculous. So, I searched online and figured out it was an Ikea duvet...that was sold out:( So, here we are, almost a year later and I run into the complete set at my local Goodwill, still in perfect condition (and with the original tags) for $11!! THAT is why I love thrift stores!


OK...let's get focused again:) I decided to take the easy way out and use hem tape for the curtains. My opinion on hem tape? I think its great for smaller projects...but after ironing and ironing on my coffee table (I don't have an ironing board)...I realized I could have sewed it much faster;)


The length of the duvet was the perfect length of curtains (yay!) so I removed both sides of the duvet. I basically ripped out the seams all the way around starting at the bottom where the opening was.


After I had one panel from my duvet, I folded that in half again and cut it into two equal parts to become my two curtain panels.


Finally I ironed in all my edges while following the direction on the hem tape package and I was done!


I absolutely love them! I wish I had a before and after to show you how pathetic they make my last curtains look...but I that's OK. I didn't want to embarrass them (or myself) anyways:)


So, I have the other side of the duvet still and that will become either a new shower curtain...or window curtains for our room as well. I also still have both pillow shams to work with too.


Total price (both panels): $4.00

Monday, May 23, 2011

Chicken Bacon Ranch Wraps (under $3)


I've tried a few new recipes this week and this one by far is our new summertime favorite.


Ingredients


1 1/2 c cooked and shredded chicken $1.00


2 tbs chopped green onions $.10


1/3 c ranch dressing (more or less depending on how you like it) $.25


4 strips cooked and chopped turkey bacon $.50


chopped romaine lettuce $.20


4 flour tortillas $.50


1 tsp chili powder $.05


salt and pepper to taste


Mix all ingredients (except lettuce and tortillas) together and salt and pepper to taste. Place lettuce on flour tortilla w/ 1/4 of chicken mixture on top. Roll up and enjoy!


This mixture would be great cold or warm. My husband prefers it cold. I like to double the recipe and keep the extra in the refrigerator for a quick lunch during the week.


I also want to try this on toasted bread with provolone cheese, or with Caesar dressing once I can eat it again:).


Total (4 servings): $2.60

Saturday, May 21, 2011

Nursery Decor Part 1: Boy Style

Although we don't know if we are having a boy or girl yet (we find out on June 10th!!), that hasn't stopped my brain from running a million miles a minute with decorating ideas for either gender:) I will show you some of my favorite ideas if it is a boy...and then my girl ideas in another post.


This is the bedding we have and we are keeping it no matter the gender. I say that now...but I may need something pink if it ends up being a girl:)


The main three colors I want to focus on are a deep mustard yellow, brown, and tan. I'm playing around with the idea of the deep green and orange as well.


The baby will be in our room for the first few months since we only have two bedrooms. Luckily our room is more than large enough to accommodate a full crib and rocking chair. So, in the corner where the crib will go, I want the space to mix with our room, but also be personalized for the baby. I made this artwork up in Photoshop...but I plan on painting it on canvas and putting it over the crib:


The name we currently like starts with a "j"...but we have found that boy names are really hard...so it may change another million times within the next 5 months.


One thing I know I want to recreate is this paper airplane garland. I love the look of all white planes...but I thought decorative scrapbook paper would be so fun too.


source


For a stuffed animal friend, I am loving this striped zebra. I am so tempted to make my own version in coordinating colors.


source


But then this octopus guy is so adorable too! Maybe one of each?


source


I am also loving this crocheted pillow. A customized version of this is a must for my rocking chair.


source


So, those are my top picks if we are having a boy! I really can't wait to find out what it is and if we really have to come up with a boy name for reals! We learned (oddly enough) that we only like one syllable names for boys. Is that weird? Anyways, that has been helping the search a bit, but not much. Do you know of any good baby name places to search (other than babynames.com)?


I'll be back with my girlie picks another day!

Friday, May 20, 2011

Creamy Chicken and Tortellini Soup (under $6)


I am FINALLY getting my appetite back...which means after my two month break from cooking on a regular basis...it's time to get back in the kitchen:) Through my first trimester I became the quesadilla, hot dog, and deli meat sandwich queen in order to put SOMETHING in front of my husband so that he didn't have to eat out every day.


Although not cooking for so long was kind of a relief...I hated not having an appetite or being able to even look at food, so I would much rather be putting meals on the table every day now .


Normally I am not a soup person, but after seeing a version of this recipe in a cook book this week, I figured I had to give it a try. BTW: I rented 10 cookbooks from the library...yes 10! I think my husband almost shed a tear when he said, "you're back". He was had been very understanding over the last few months:)


The original version just calls for chicken stock...but I like creamy soups...so I added some alfredo sauce to thicken it up. I also added some parsley as well. Also, from now on when I post my recipes, I am going to add up the cost since I know we are all trying to save on homemade dinners these days!


Ingredients:


1 package of cheese tortellini $3.29


1-2 cups of shredded cooked chicken $1.00


(you can use how ever much you like. I used a little less than a cup and found that it was enough)


3 celery stalks - chopped $.20


3 carrots - chopped $.20


1 medium onion - chopped (I used 1/4 c frozen) $.15


1 clove garlic - minced $.03


1 can chicken stock (I used broth) $.67


1/4 c alfredo sauce $.35


1 tbs parsley flakes (or fresh parsley) $.05


Directions:


Boil the tortellini is saucepan per package instructions


While tortellini is boiling, saute' celery, carrots, onion, and garlic on medium high heat for 10 minutes. Salt and pepper to taste.


(For minced garlic, I use my handheld grater that I got at the dollar store. I grate the garlic cloves right over the pot)


Add cooked chicken, chicken stock (or broth), alfredo sauce, and cooked tortellini to the vegetables along with parsley flakes and more salt or pepper if you like.


Cover and put on low for 30 minutes.


I served it with some french bread slices that I put in the toaster. If you like a creamier soup, you can add more of the alfredo sauce. This soup can also be customized to your vegetables tastes. You could try it with some peas or broccoli as well. This might also be nice with a spicy Italian sausage instead of chicken and maybe some thinly cut potato slices.


Best of all, this soup is so hearty and filling and smells amazing while it's cooking! Your husband will think SO much more work went into it than it did:)


Total (4-6 servings): $5.94


I am truly amazed at how much money (and how many calories!) we can save by eating at home and lately, home cooked meals have never tasted so good;)


I'm linked to:


Tatertots and Jello

Monday, May 9, 2011

Cherry Pineapple "Dump" Cake


This recipe was given to me by my MIL and it's a favorite spring "go to" when I don't feel like putting the effort into a dessert...but I want a great reward;)


Here are the ingredients:


1 boxed yellow cake mix


1 can crushed pineapple (drained)


1 can cherry pie filling


1 stick of butter


So, the cake gets the term "dump cake" because you basically just dump all the ingredients in the pan! But, maybe call it something else to your husband if he always has to laugh at the word "dump". Men.


1. Pour the cherry pie filling in your baking dish. You can use a 9x13 or I used my 12x12 dish.


Pour drained pineapple into dish and mix with the pie filling.


Now, the original recipe calls for you to just pour the cake mix over the top and dot it with a stick of butter...but since I can't seem to "dot" cohesively....I would always end up with dry mix one place and butter rivers in others when I pulled it out of the oven.


SO...I came up with an easier way for me to make the top without crying:) I use my hand mixer to blend the cake mix and butter.


I mix until there are "pea size" pieces of cake mix. You want a streusel-like texture.


Now sprinkle the cake mixture over the top of your filling and bake at 350 degrees for 40-45 minutes.


The center will jiggle a bit when you pull it out of the oven and the sides of the top with be a bit browned. The top should also be a bit hard. The center will settle as it cools. You can serve this warm, or at room temperature. I have found it gets devoured either way!


My MIL has also tried this with other pie fillings, such as blueberry so that's something I want to try. Also, this fall I want to attempt an all apple version with a spice cake topping. There are so many variations. You can't really taste chunks of pineapple either (in case there is a pineapple hater in your group). I always get asked whats in with the cherry since it just has a tangy taste.


Enjoy! There is one more serving left on my counter...so I just convinced myself to have it:)

Friday, May 6, 2011

What To Blog About...When There is Nothing to Blog About?

So, I have been the laziest blogger lately! I am 13 weeks along with my pregnancy and I can see week 14 ahead of me....where all my hopes and dreams of not being nauseous live! Oh, I hope it is as glorious as I hope it will be! For now, I still have my nausea pills that work, kinda. I can only take one a day (at night) because they make me SUPER tired.


So, I haven't been up to much crafting lately. I tried yesterday and I couldn't find my glue gun! I was seriously panicked for a while (until the drowsiness side effect of my nausea pill kicked in) and I still can't find it. So sad.


Another excuse for not blogging? Well, nothing. Just being lazy! I get upstairs at night to sit down and download pictures...and then I realize my camera card it still downstairs. So...then I just go to bed. Uh...my bedtime these days is 8:30pm. Yeah. I'm a real "go-getter" these days! Stairs and I are enemies right now. I have only put 2 pounds on with my pregnancy so far...but for some reason going up them leaves me wheezing. What is that?


SO...here is one fun, non-craft related thing we did this week. My friend (and bridesmaid alumni) Jess works for the Civic Center at a nearby city and the morning news was filming a segment at a restaurant. So she invited my daughter and myself to come down, eat some free food, and be on the news;)


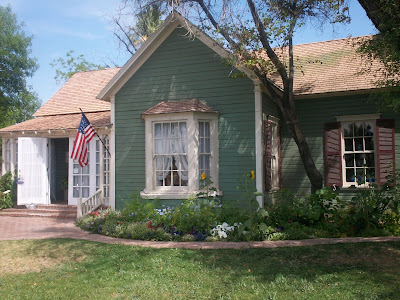
This was the restaurant: A super cute house with an equally adorable baker in the kitchen that made the BEST rolls!


Pretty flowers on the table:


News vans outside:


It was so much fun to hang out with my friend and eat some yummy food and just have a girl's morning:) Plus, my daughter made it out of the antique house (filled with lots of antique things) without breaking anything! Woo-hoo!


Nothing else is really goin' on around here. We have 100 degrees already so that makes me stay inside more that I probably should:) I'm just ready for my energy to kick in with my second trimester!


This is my view these days:


My shoes still match. Score!


I hope to have new things to share soon! My mom took pity on me today and took me out to the vintage shops (after being super stressed all week and a pitiful phone call this morning when my daughter cut her head open on the bottom of a dresser drawer...yeah one of those days), so I had some MAJOR scores while I was there. I can't wait to show you the awesome green Drexel chair I scored for $20! Vintage retail therapy is amazing:) Or maybe it was just alone for two hours??


I am also working on our bedroom and this time I WILL get it done! It will be the first time in 5 years...but I have a vision for it that both my husband and I love...so I just gotta get the motivation...before 8:30 at night;)


SO, that's what I have been up to! I still stalk blogs constantly...just nothing too much for me to write about myself:) Now I am off to the store. I need mini chimichangas and cilantro, stat! And yes, the chimichangas have to be mini, this baby is very specific:)


PS-I have my 14 week appointment on the 16th, so I would appreciate some prayers! I am very nervous and anxious about it since it is my first appointment after 12 weeks. Thanks:)


PPS-Is chimichangas not a real word? Apparently spell check thinks I mean to spell "mechanics". Hmmm...

LinkWithin

Related Posts with Thumbnails