Friday, December 31, 2010

2010 in Review

I've haven't even been blogging for a year yet...but I'm so grateful for this little space that I have. I love being able to share what I make and see what others are making as well. I started with just me and some ideas that I wanted to share...now I have followers...real people that want to follow this blog. Crazy.

I put together my top 10 favorite posts in 2010 in no particular order:

1. Foam Chair Slipcover

2. Pier 1 Knock Off

3. Minnie Mouse Costume

4. Ruffle Tree Skirt

5. Painted Chevron Pillows

6. Best Whipped Frosting

7. Silhouette Shirt

8. Hanging a Photo Collage with Foil

9. Padded Steering Wheel Cover

10. Anthro Inspired Necklace

It's been a heck of a year filled with ups and downs, and I'm so glad I have a place to share it all. Thank you so much to anyone who has visited, commented, or follows. I appreciate you all so much and I can't wait to see what is to come next year!

Thursday, December 23, 2010

Felt Flower Embellishments

We promised our daughter that we would go up north and play in the snow this year. We have absolutely no appropriate clothing for such weather...so when I came across this hat and glove set at Joann the other day...I had to snatch it up for our cold day of fun! They were on sale for $2 each...but they looked a little plain.

I used this tutorial from Tatertots and Jello for easy felt flowers.

Materials:

9x12 piece of felt (for one large flower)

hot glue gun

1. Cut out six "flower" shapes from your felt...along with a round circle to glue all your petals to.

2. Put a dab of hot glue in the center of your flower and fold in half.

3. Place another dab of hot glue in the middle of the bottom of your half flower and fold in half again.

Here are all six of my petals:

4. Glue five of the petals around the edge of the circle.

6. Now, you can put a bead in the center of the petals...but I chose to glue the last petal in the center, straight up, to make the flower more full.

That's it! Super easy, right? You can also add leaves, like in the original tutorial, but I like it plain like this.

I glued it to my winter hat to jazz it up a bit. My husband liked the hat better before I added the flower...but he just said, "I don't know why I expected you to wear it plain!". Exactly. He knows me well!

Finally, I took a strip of felt and rolled it up to make a little rosette. I glued it to the left "ring finger" of the glove.

I love my new hat and gloves set. I have a hat and gloves set planned for my daughter out of red fleece...so hopefully I can get that done before next week.

Price:

hat/gloves: $4.00

felt: $.29

Total: $4.29

Wednesday, December 22, 2010

Ruffle Heart Pillow

I went out to Joann yesterday...and spent the most I have ever spent at any craft store...I spent $25! I almost choked when I heard the total. I did manage to get everything I need for my daughter's baby clothes quilt and the materials to make this pillow...so it wasn't wasted money. I'm just normally always the one pulling down the shopper's spending average with my normal $.89 purchases:)

This was the first craft that I have attempted in a few weeks. My daughter saw a plain heart pillow at Target...but I was too cheap to spend $10 on a plain pillow. I went to get started on this pillow...when I realized that my house looked like this:

...and this...

SO...since I can't happily relax until my house is clean...I folded the 4 loads of laundry, put it away, cleaned the bathroom, the floors, and the dining room. Then I was ready to get my craft on!

Materials:

fleece (I had a 1yd remnant)

matching thread

pillow stuffing

TIP: Always make sure to check the remnant section of the fabric store. Most of the time there is nothing wrong with them. The store has to make remnants once there is less than 1yd on the bolt. You can save a lot on more expensive fabric this way...especially if you don't need much. I got this remnant (which was almost one yard) for half price of half price. Remnants are 50% off of the current price for that fabric...so the fleece was normally $9 a yard...but it was on sale for $4.50 a yard. So my remnant was again half of that making it a little more than $2.50. Make sense?

1. Cut out two heart shapes in the size you want. I made the bottoms a little more rounded than pointy so it would sit nice on the bed. In hindsight, I would have added more of a point than I did.

Also, draw out where you want your ruffle strips to go. I chose two.

2. Cut out the ruffle strips from the rest of your fleece. I cut them about 1" wide. I cut out about 7 and only ended up using 5.

3. Sew the strips into ruffles along the lines that you had drawn on. To learn how to ruffle on the sewing machine, check out my Ruffle Tree Skirt.

4. With right sides facing, pin and sew around the edges of the heart panels, leaving an opening to turn it right side out.

5. Flip right side out and stuff. Sew the opening closed.

That's it! I have to admit...I don't love it. The heart shape wasn't exactly what I was going for. It is growing on me. Does anyone ever finish a craft that they hate one night, but then it doesn't look so bad in the morning? Anyways, I know my daughter will love it...so that's all that matters. It helps when your recipient is 2:)

My edges (where I sewed both pieces together) is a little puckered in certain spots...so I may glue on some more ruffle strips along the seam. Ruffles fix everything, don't they?

I also made this larger than the one at Target. Its about 5-6" smaller than a standard pillow. I thought it would look so cute on her big girl bed...whenever we get around to moving her into it. She keeps promising me, "I will stay in it...I promise!" Does anyone else have trouble believing a toddler?

So, that's my first craft. It felt good to be sewing again. This time of year is especially hard right now. I was so sure we would get our first ultrasound, put it in the 4th picture frame stocking holder we have, and move on our merry way. This is probably the first year I am ready to get through to the new year. I really am trying to stop and enjoy this time of year, though. It's still so magical to see it through my daughter's eyes.

Price:

fleece remnant: $2.37

pillow stuffing: $1.50

Total: $3.87

Better than $10, right?

I'm linked to:

Sugar and Dots

Tea Rose Home

Someday Crafts

Tuesday, November 30, 2010

Ruffle Tree Skirt from a Fleece Blanket

I have been wanting a new tree skirt for a while. My husband and I got all our Christmas decorations on clearance the month before we got married so that we would have a tree and decorations the following year for our first Christmas. Now, although that was a good idea (we got a 7ft pre lit tree for $25!) it was slim pickings when it came to tree skirts...and for some reason I never got around to replacing it over the last five years!

So, this was the year to upgrade! I wanted something simple to make, but classic and that would last for years to come.

I started with a fleece blanket that I found at Walmart for $3. They also had a lot of other colors to choose from if red isn't your favorite:)

The blanket was 50"x60".

1. First I measured how wide I wanted the skirt to be. I wanted it to be the same width as the bottom of the tree, which was 36".

2. I cut out a 36" square from my blanket.

3. I folded the square in half one direction and then in half the other direction so I had a smaller square. This is so I just had to cut one corner once instead of cutting each corner.

4. I fashioned a ghetto compass by using a piece of yarn and tying it to the end of a marker and then holding the other end to the bottom left corner (center of fold) and marking from the top left corner to the bottom right corner. You want to make the mark on the sides with the raw edges.

(The compass line is the bottom one)

5. I cut on that line.

6. Then I unfolded the circle and trimmed any places that needed to be evened up.

7. Next, I cut a slit halfway up the middle so that I could try it on the tree to make sure it was the right dimensions.

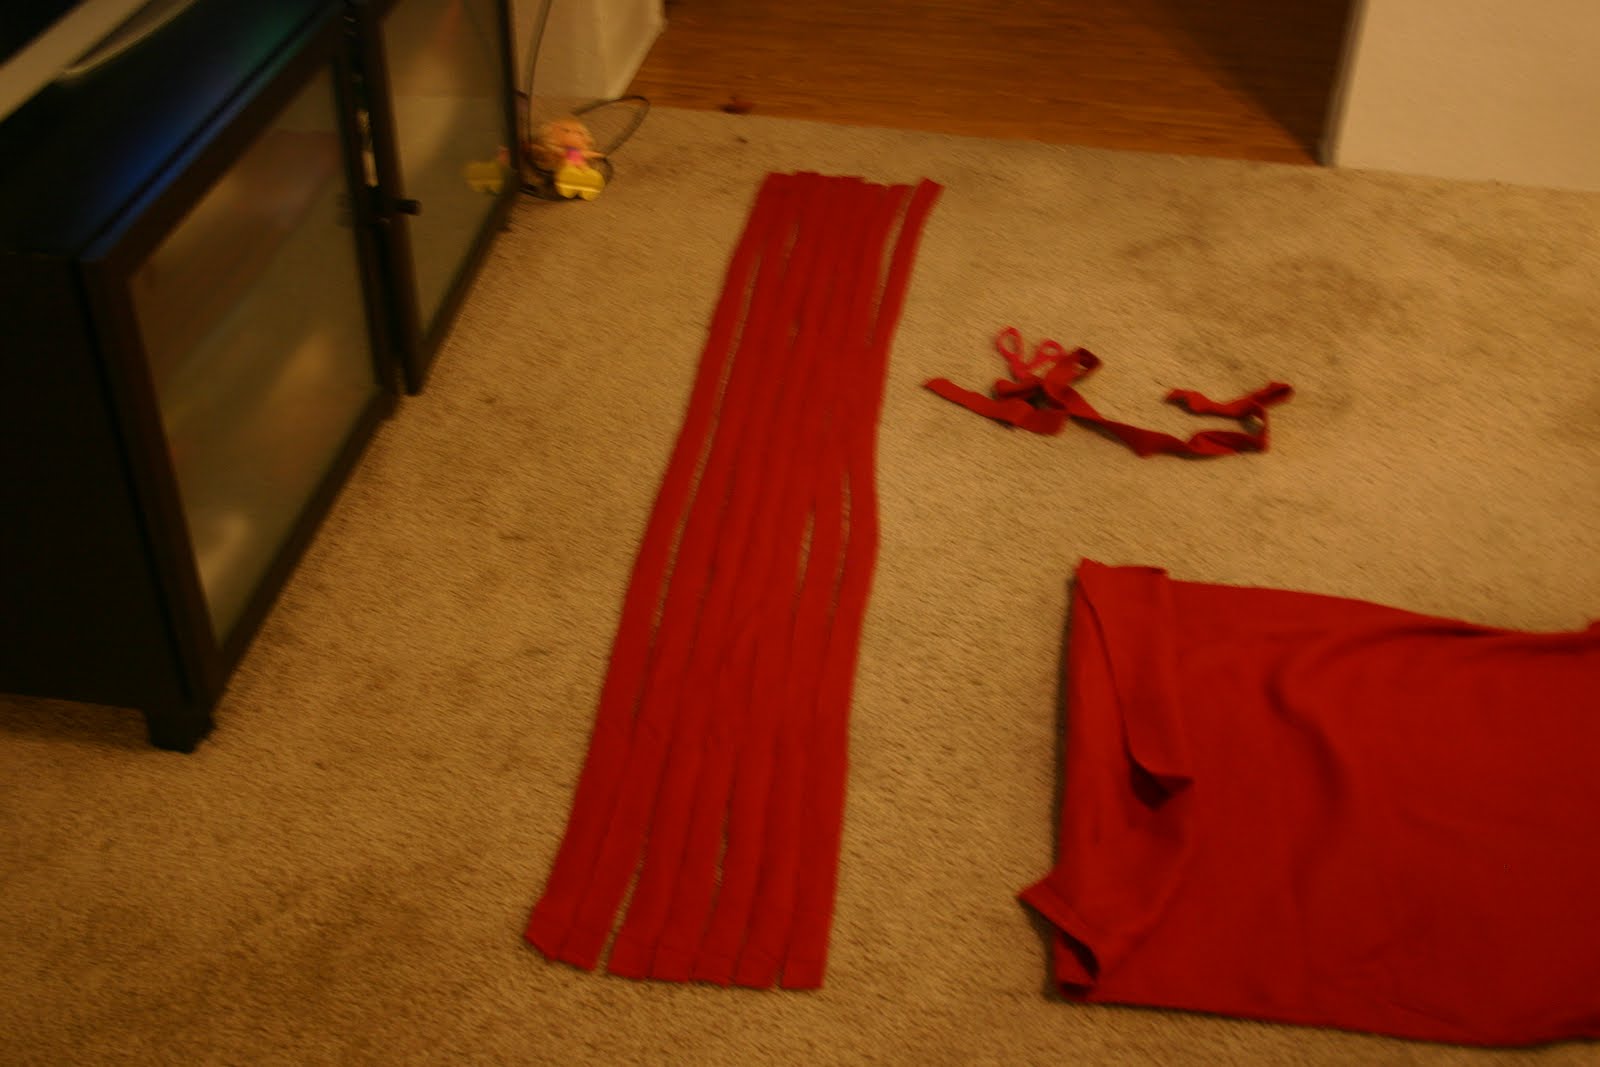
8. Next, I took the remaining long side of the blanket and cut strips that were about 1 and 1/2" wide.

9. I started sewing the strips around the bottom edge, ruffling the strip as I went. One strip was not long enough for the entire edge, so I just added strips as I went along, folding under the beginning of the next strip so it just looked like another ruffle in the same strip.

This is how I ruffle on the machine. I work in about 3" increments, gathering about three ruffles, sewing them down, stopping the machine (with the needle still in the fabric) and then grabbing more of the strip to ruffle.

I just free handed the strip all the way around, but if that worries you, then while your tree skirt circle is smoothed out, draw on lines for your ruffles and use that as a guide as you are sewing.

10. I added another ruffle strip a couple of inches in from the bottom one.

(And yes...that is a pile of clean laundry on my bed)

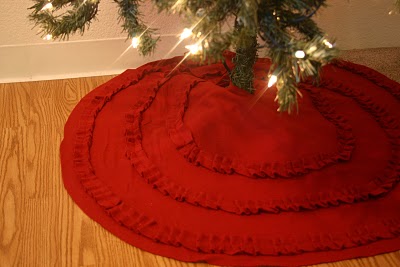
11. I added a third row of ruffles a couple more inches in and decided to be done there.

Super easy right? I love the weight and feel of the fleece...and that I didn't have to finish any of the edges. That made it a lot quicker to make.

You could do this with any design, not just ruffles. You could use the rest of the blanket to make little layered flowers for the skirt, or any other shapes and designs you want:)

Total Price: $3.00

I'm linked to:

Sew Much Ado

Monday, November 29, 2010

Coffee Filter Tree

I had some coffee filters left over from my Coffee Filter Wreath so I came up with this coffee filter tree for Christmas.

Materials:

1/2 pack of coffee filters

poster board

hot glue gun

I cut a rectangle out of white poster board (about 1/4th of the whole sheet). Then I rolled and glued it to make a cone.

There was a little tail at the bottom so I cut it flush.

I took a coffee filter and cut it in half.

Then I folded that in half twice and scrunched it a bit so it looked more ruffled.

I cut the bottom off so I could glue it on to the cone.

I started gluing along the bottom.

Worked my way up:

And then glued one last puff on the top.

Finally, it still looked a little plain, so I got a wooden star at the craft store and painted it red. I wanted the star to look more stained than painted, so right after I painted the red on, I just wiped it right off with a paper towel. I glued the back of the star to a toothpick and shoved it in the top.

There are a few more Christmas crafts I have planned...if I can manage to get them done before Christmas:)

Price:

coffee filters: already had

poster board: $.50

star: $.25

Total: $.75

Thursday, November 25, 2010

Muffin Pan Advent Calendar

I hope everyone had a great Thanksgiving! I know I have so many things to be thankful for and it was great spending the day with my closest loved ones and appreciating everything in my life:)

Now that my daughter is two, I wanted a fun advent calendar for the days leading up to Christmas. I have seen a lot of ideas online about using a flat cookie sheet and then using mini magnetic tins for the days and then I also saw this idea of using a mini muffin pan.

I got this 24 count muffin pan at Goodwill for $1.00 a few months ago. It had some markings on it...but I figured it would be covered by paper anyways. You can also find one of these at Walmart or Target for about $10.

I spray painted the front and back of the pan with red paint.

From what I read online, spray paint will not adhere to a Teflon coated pan...so keep that in mind when looking for one.

Next, I found a large 9x12 magnetic sheet at Joann. I cut 2"x2" squares to cover the holes.

Then, I cut out coordinating scrapbook paper in the same size and Mod Podged it onto the magnetic sheet. You can also find adhesive magnetic sheets so you wouldn't have to glue your paper on.

Align Center

Finally, I cut out 1"x1" squares of scrapbook paper and wrote the numbers on. I couldn't find cute number stickers this week and I didn't want to go to another store just for that...ever been there?

I also filled the tins with some peppermint bark bells and thin mints. Also, this week I am going to print out little strips for each cup that will tell the story of Jesus' birth.

I chose to leave my more simple than ones I have seen online...just cause that's more my style, but there are a ton of variations you can do with this. I thought about making more magnetic covers for more holidays like birthdays or our wedding anniversary:)

I can't wait to get out the rest of my Christmas decorations this weekend. We don't have much room to decorate...but that won't stop me from putting up our tree! It's a must:)
Price:
muffin pan: $1.00
magnetic sheet: $1.50
scrapbook paper: $1.00
candy: $2.00
Total: $5.50

LinkWithin

Related Posts with Thumbnails