Wednesday, July 7, 2010

Cloth Placemat Pillow

I found this butterfly placemat at TJ Maxx today in the clearance section. They had so many beautiful colors...it was hard to choose...but we went with a household favorite...pink!

Here is how you can make your own placemat pillow:

Materials:

cloth placemat (make sure it has two separate sides so that you can open up the seam and stuff it)

needle and thread

pillow stuffing

seam ripper

Here is my placemat before. Iron it if needed.

1. Rip out the existing seam on the bottom (or what will be the bottom) of your placemat. I opened it just large enough for my hand to fit in for stuffing it later.

2. Stuff your placemat. I used an old pillow that I was going to get rid of.

3. Fold in the seams and sew closed.

I kneaded the pillow a little afterwards (almost like dough) to get all the stuffing even and to get rid of any lumps.

And that's it!

My daughter was so excited when I handed it to her. She carried at around all afternoon saying, "Oh...pretty buttersly!"...so I guess it is approved:) She even had to show my husband before bedtime. I think it made going to bed a little easier for her...so it was well worth it!

Total Price: $2.00 for the placemat.

Tuesday, July 6, 2010

Mod Podge Soap Dispenser

This is one of those times that my camera forgot to save every picture of this step-by-step process...except the last one:) I am grateful I have at least one picture to share! Luckily this was so easy that I can describe it...I think:)

Materials:

clear spray paint

Mod Podge (I used the gloss finish)

foam brush

paint (I used acrylic)

decorative paper (enough to cover surface area of dispenser)

old soap dispenser that needs some love:)

1. Start by taking the pump off the top (you could rinse out all your soap and wait for it to dry...but I didn't want to waste time...or soap...so I just put a little piece of paper over the top and left the soap in there.)

2. Paint your soap dispenser with the foam brush. I did a few coats.

3. Spray with clear spray paint.

4. Cut out your paper in the size that you want it to be for the dispenser. Apply Mod Podge to surface of dispenser and back of your paper. Roll your paper around the dispenser and press out the air bubbles by work from the center of the paper out to the edges.

5. Let dry and seal whole surface of dispenser with more Mod Podge. I did three coats....letting each one fully dry in between.

6. Now spray whole surface with clear spray paint again to make it water resistant. I gave it two good coats.

7. Place the pump back in and pat yourself on the back for recycling something!

I hope that all made sense even without pictures:) Let me know if you make one! My dispenser used to be brown with an old looking map design on it...now I love it! I am going to have to try this again...maybe with fabric?

I had everything on hand except the paper...so this whole project just cost me $.20!

Thursday, July 1, 2010

Fabric Shower Curtain Hooks

Recently I have been updating our guest bathroom. The shower curtain hooks were two shades of brown...so I painted them white...but still wasn't satisfied. So I went through my fabric scraps and found this material that I had previously used on a lamp shade redo. I ended up taking it off the lamp shade because I thought it was a little too busy...but it looked perfect over my shower hooks!

Materials:

shower curtain hooks

scrap of fabric enough to cover all hooks.

hot glue gun

scissors

1. Cut out your fabric with about 3/4" extra all the way around.

2. Dab some glue in the center of your ring piece and place on the wrong side of your fabric.

3. Start to glue and wrap the edges of the hook all the way around.

Here is a finished one:

I thought I wanted every hook to look exactly the same...but I had more fun playing around with the different directions of the fabric.

They still are a little too neutral for me...so maybe I will go back and paint in the centers with a brighter color:)

These are for my guest bathroom that almost never gets used...so I have no idea how they would hold up in a super steamy bathroom. I have hot glued paper onto the hooks in our other bathroom that gets used regularly...and they are fine.

Price:

hooks: $0...I already had them

material: $1.50

Total: $1.50

http://Join  us Saturdays at tatertotsandjello.com for the weekend wrap up    party!


Monday, June 28, 2010

Pillowcase Challenge #2: Ruffle Tote

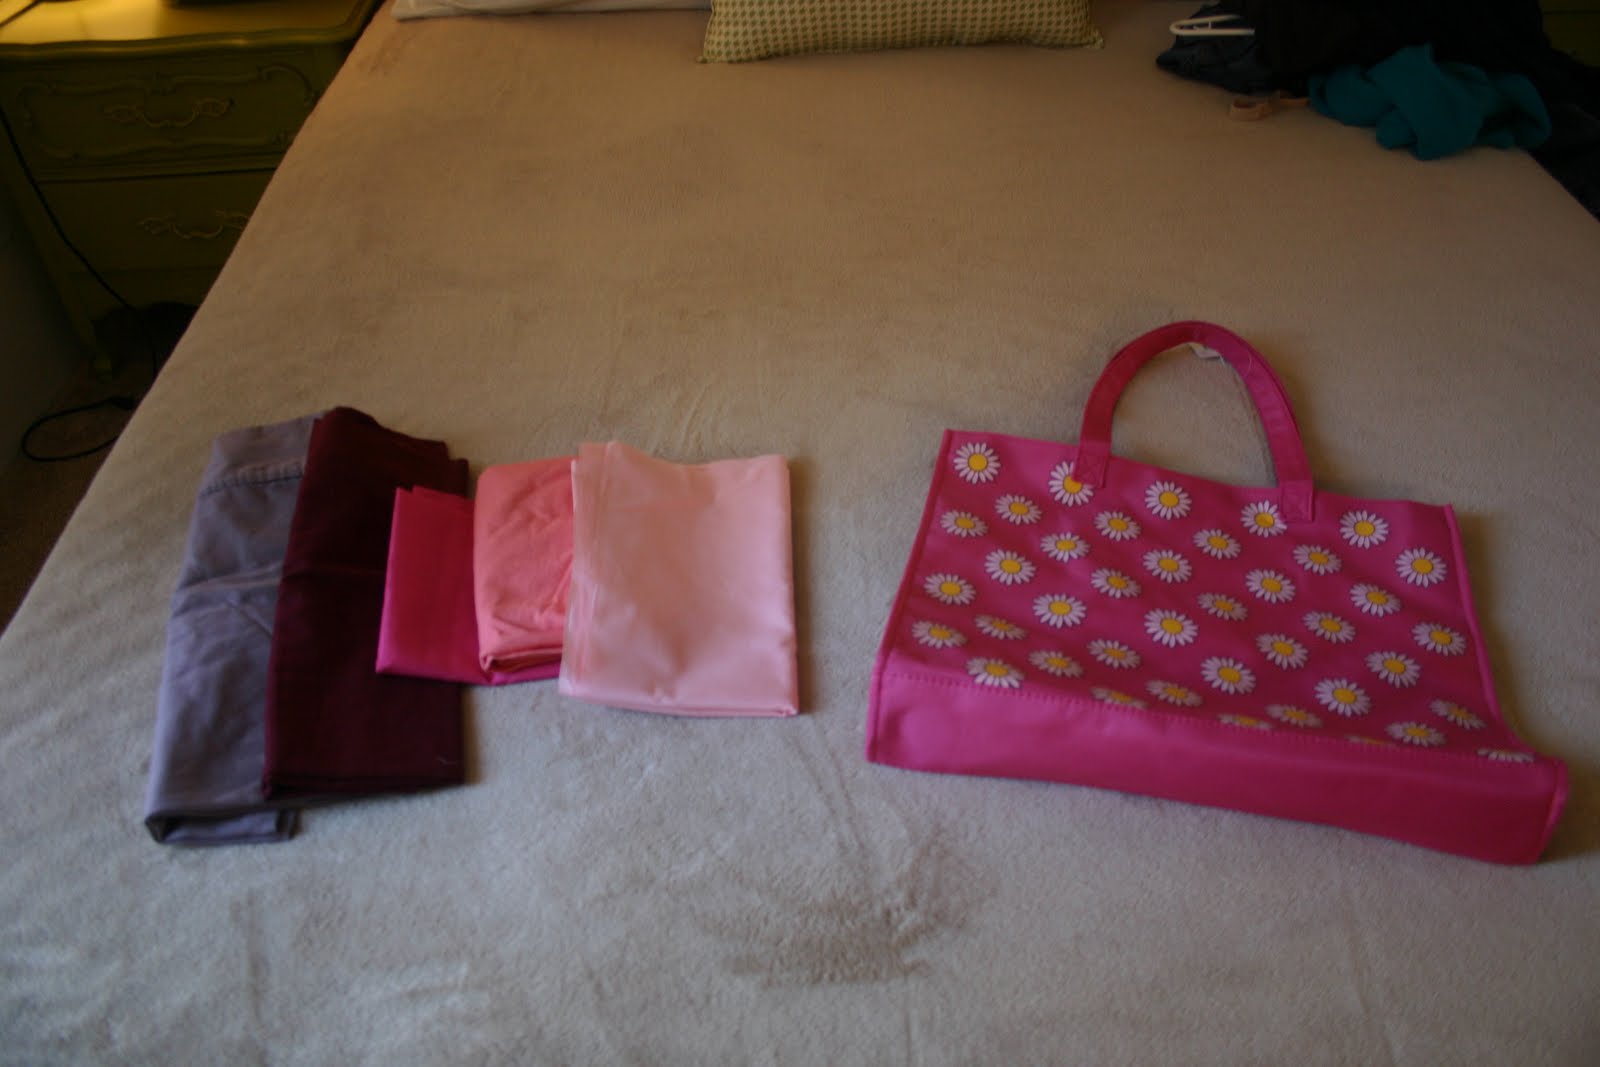
I found this flower tote at the craft store this week on clearance for $1.97...so I knew there was something I could do with it since the flowers on it weren't really my taste.

So I went through my fabric stash and found these solid colors that I thought would look good together as ruffles for the front of the bag. I am considering this #2 in my pillowcase challenge since two of the colors I used were from pillowcases:)

1. Assemble colors that you want for your ruffles. They can be solid or prints. I thought about throwing in the grayish purple in the picture below...but decided against it at the last minute.

2. Cut out strips that are double the length and double the width plus 1/2" of your finished ruffle. I wanted my ruffled 3" long when finished and so I cut them 6 1/2" long...and then only 27" inches wide because I didn't have enough of my fabric scraps for any more.

3. Fold the strip lengthwise with right sides together and sew up both short sides. I used a 1/4" seam so I wouldn't loose much on the length. Flip right side out and press the seams.

4. Fold the top of the ruffle down 1/2" and press.

5. Repeat with the rest of the ruffle strips.

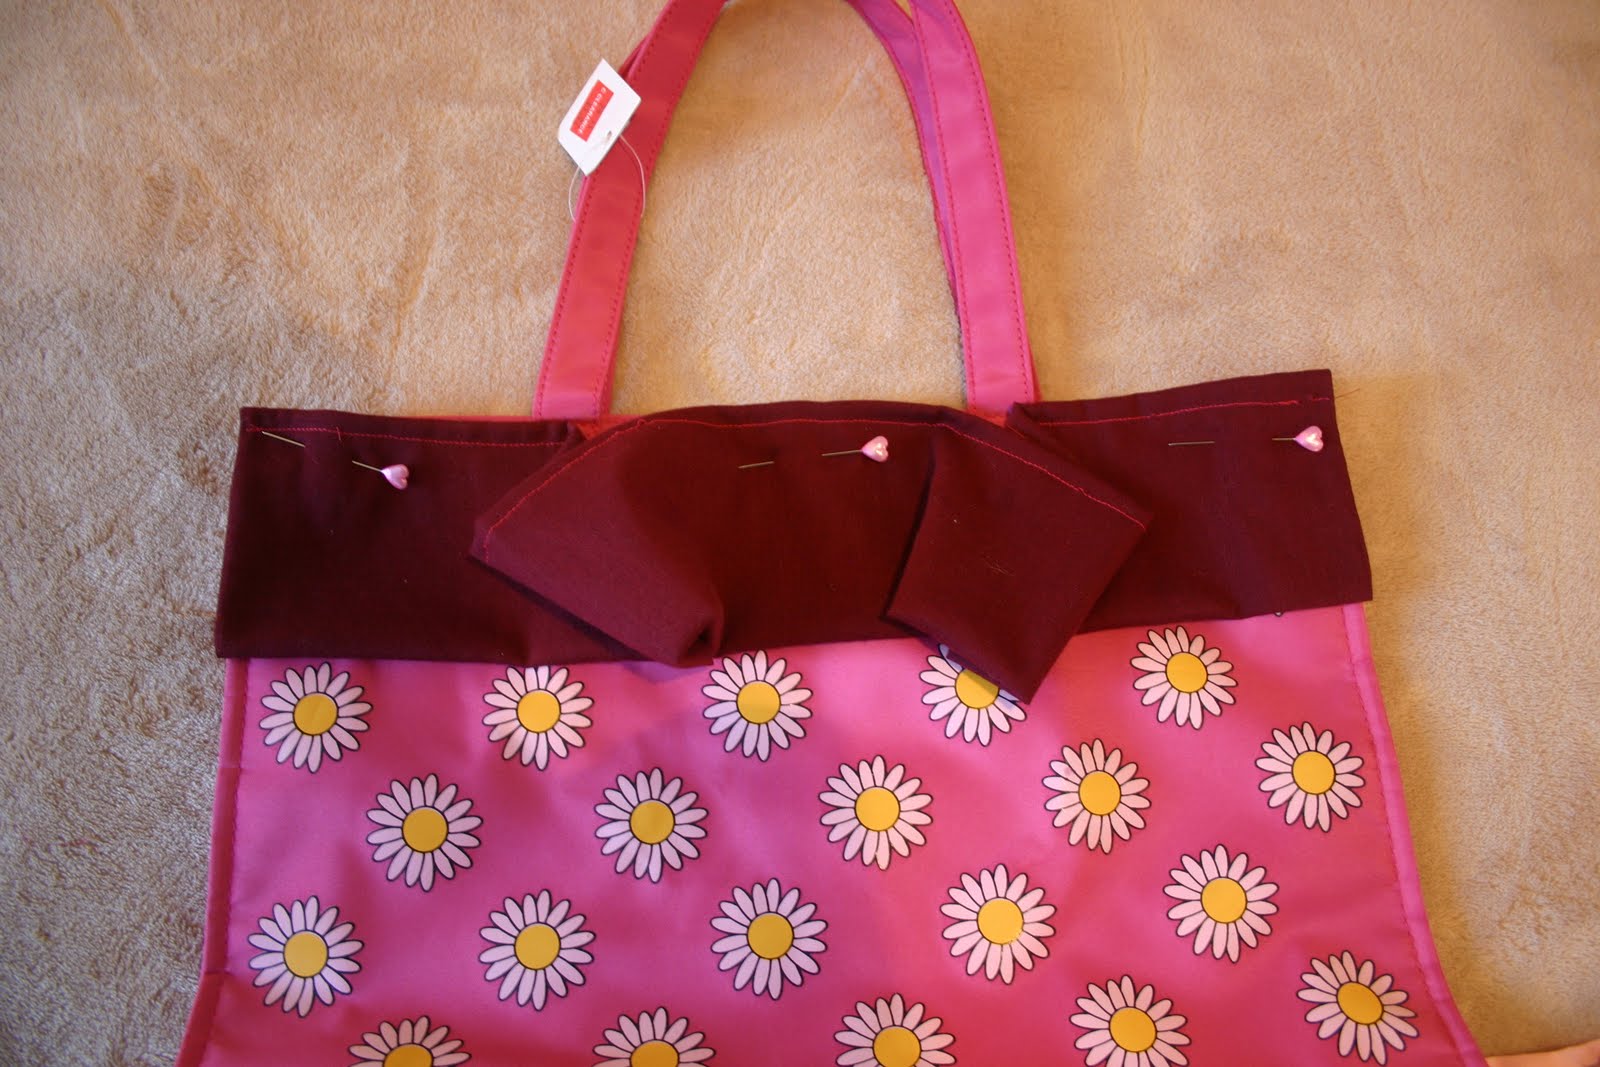
6. Pin the ends of the ruffle strip to the ends of the bag and then the middle of the strip to the middle of the bag. This will help keep the strip even when you ruffle it on the sewing machine.

7. Sew to the top of the bag. To create a ruffle, gather the material as you go in even segments.

This was a little too much for my sewing machine...so without running the risk of breaking it...I cheated and glued on the rest of the ruffles:) Sewing would be a stronger way to go and will last longer...I just didn't want to push my machine too hard.

8. Under your top ruffle, measure out equal lines for your remaining ruffles. This will make it easier to keep your ruffles straight as you add them. Add your ruffles the same way you did your top ruffle.

I think I will use this bag for our weekly trip to the library:)

Price:

tote bag: $1.97

fabric: $1.00

Total: $2.97

Wednesday, June 23, 2010

Flower Headband from Scraps

I love flower headbands! I love them on my daughter (who won't keep them on more than 5 minutes) and I love to wear them too! I had some scraps left over from a corduroy that I LOVE...so I made it into a flower headband.

I used 1/8 of a yard for this project.

1. Start by cutting circles out of your scraps. I made the circles about 1 1/2" in diameter. Then cut those circles in half so that you have a bunch of half circles.

I cut out 24 half circles total...but didn't end up using them all.

2. Cut a circle out of felt that is the diameter you want the finished flower to be. I used my camera lens cap which was 3 1/2" in diameter.

3. With your hot glue gun, start gluing your half circles around the edge of your felt circle. Always work in odd numbers...it makes the flower look more realistic.

4. Now for the next layer we want more dimension...so put a dab of hot glue in the bottom center of the half circle. Fold in half so the glue oozes a little bit to create a crease in the center of the half circle like shown below. Do this for all the remaining half circles.

5. Glue those around the inside of the flower overlapping the first layer.

6. Continue adding layers of flowers until you reach the center. It may help to cut down the half circles a bit once reaching the center.

You can put whatever you like in the center, a button, a gem, a brad...but I wanted a covered button.

6. Cut out a circle of fabric that is about 1/2" larger all around than your button. Apply hot glue to the outer rim of the button, pressing your fabric in as you go.

7. Glue the button in the center of the flower.

Now this flower can be used on almost anything, a picture frame, a hair tie, a pin for a blouse...but I chose a lightweight metal headband.

To attach to a headband, place the headband on your head and hold the flower where you would like it to be. Grab the headband with your fingers at that place and while taking off the band, keep your fingers in place marking that spot. You could also mark the spot with a bobby pin.

Glue the flower in that spot, and then for durability and comfort, cut out a smaller piece of matching felt and glue that over the headband to the back of the flower.

Price:

material: $0.75

headband: $0.20

Total: $0.95

Tuesday, June 15, 2010

Remove the Collar From a Dress

I found this dress at Target on the 75% off rack for $6.00...so of course I tried it on...and I loved it!...except it had a collar. See, me and collars don't get along too well. I have a shorter neck...so I feel like I lose it all together when I wear one.

So here I am trying the dress on, loving the fit everywhere...but the neck (which is the LAST place I normally dislike!). So I folded the collar under and loved the look...so I decided there had to be a way to remove it...and I took a chance on the $6.00 dress.

Here is what I looked like in the dress before:....:)

The collar was top stitched on (not between any layers)...so I took my seam ripper and started taking it off. I had hoped that the fabric underneath was going to be finished and I wouldn't have to do anything at all...but no such luck:)

I thought hard about how to take in the raw edges without it looking like I did...so I finally decided that since this was a wrap dress...I would take in the edges 1/4" all the way around the dress.

So I folded them in 1/4", pinned, and sewed.

And TA-DA! A collarless dress for my tiny neck:)

So what did I do with the collar? Recovered an old headband for my daughter of course! She has a pair of leggings this exact color (also from Target)

I'm going to call this project free since I didn't have to spend any additional money to complete it. Don't you love it when that happens? Plus now I have a dress AND a headband for $6!

Saturday, June 12, 2010

Ribbon Photo Frame


Recently I was in Target looking around and saw this idea for a photo frame. Anyone else go to Target just to walk around and soak in the decor goodness? Every season they seem to put out things that I love...it's like they can read my mind! Also, the Little Miss loves Target because we get the popcorn and drink combo for $1.50...so she snacks on "pocorn" and Mommy also gets a diet soda treat:) We have done it so often...that now she yells out, "Yeah pocorn!" when we pull in the parking lot...

So here is my version of the frame I saw...sorry I couldn't find a pic of it on their website.

Materials:

$1.00 frame from Michaels

paint


ribbon (I used satin)


scrapbook paper...or decorative paper of choice


Mod Podge (I used the matte finish)


sponge brush


hot glue gun


1. Cut the shape of your frame out of the paper. Also cut it a little smaller all around the edges and inside.


2. Paint the frame.


3. Apply Mod Podge to the frame and back of your paper with the brush. Smooth out the paper with your fingers frame the center moving out towards the edges.


Then brush on another layer of Mod Podge all over the top and sides of the frame.


Optional: I sanded around the edges and inside of the frame. I liked the shabby look that it created.


4. Cut a piece of ribbon the length of the frame and glue on either side of the back of the frame.


5. Tie a bow with the rest of the ribbon. Glue it to the center of the frame and then trim the edges the desired length.


And you're done! Now I just need to hang the shelf in my daughter's room for this to sit on...

Also these frames from Michaels don't come with a piece of glass...so what I have done in the past is buy the largest (sometimes 11x14) frame at the dollar store that comes with that thin plastic instead of glass...and then cut it to size for other odd shape frames. Just an option!


Price:


frame: $1.00


paper: $.25


ribbon: $.50


Total: $1.75

LinkWithin

Related Posts with Thumbnails